Diving into the delightful world of gluten free Hawaiian rolls, we embark on a culinary journey that promises not just a feast for the taste buds but also a beacon of hope for those navigating the challenges of gluten sensitivity and celiac disease. This comprehensive article unfolds the secrets behind crafting the perfect gluten free Hawaiian rolls, ensuring that the cherished experience of indulging in these soft, fluffy delights remains uncompromised. From essential baking tools and ingredients to a step-by-step guide on baking and customizing your rolls, we’ve got everything covered. Plus, with handy tips on making ahead and storing, alongside answers to your burning FAQs, this guide is your ultimate companion to mastering gluten free Hawaiian rolls.
Introduction to Gluten-Free Hawaiian Rolls
Ah, the sweet, tender embrace of Hawaiian rolls! There’s something about these buttery delights that brings a smile to faces and warmth to gatherings. Yet, for those embarking on a gluten-free journey, the longing for such comforting bread could feel like a distant dream. Fear not, for the quest for the ultimate gluten free Hawaiian rolls ends right here. These rolls aren’t just about substituting ingredients; they’re about reclaiming those joyful moments at the dinner table, bite by delicious bite.
Embracing gluten-free options isn’t just a dietary choice for many; it’s a necessary path to well-being. With gluten sensitivity and celiac disease on the rise, the demand for gluten-free recipes has never been higher. Yet, amidst the sea of gluten-free bread, finding the right texture and flavor that echo the classic Hawaiian rolls can be a daunting challenge.
But here’s the good news: achieving that perfect blend of sweetness and fluffiness with gluten free Hawaiian rolls is entirely possible. This article dives deep into the art and science of gluten-free baking, equipped with a treasure trove of tips, techniques, and a foolproof recipe that guarantees success. Whether you’re a seasoned baker or a curious novice, ready to explore the gluten-free realm, this guide promises to elevate your baking adventure.
So, let’s roll up our sleeves and embark on this gluten-free quest. Together, we’ll discover how to bring the beloved Hawaiian rolls back to the table, ensuring that everyone, regardless of dietary restrictions, can partake in the joy and delight that these rolls bring. Join us as we journey through the essentials of gluten-free baking, unravel the secrets behind the perfect dough, and celebrate the beauty of baking with inclusion and joy at heart.
Why Gluten-Free?
The Rising Need for Gluten-Free Options
In the realm of baking and bread-making, the movement towards gluten free Hawaiian rolls isn’t merely a trend; it’s a lifeline for millions. It’s become glaringly evident that for some, gluten isn’t just a benign protein found in wheat, barley, and rye—it’s a trigger for discomfort, distress, and for those with celiac disease, serious health repercussions.
Understanding Gluten Sensitivity and Celiac Disease
So, why gluten-free? For starters, gluten sensitivity—a condition where gluten ingestion leads to symptoms like bloating, gas, and abdominal pain—has become increasingly common. Moreover, celiac disease, an autoimmune disorder where the ingestion of gluten leads to damage in the small intestine, affects about 1 in 100 people worldwide, according to the Celiac Disease Foundation. For these individuals, gluten-free isn’t a choice; it’s an absolute must.
The Importance of Inclusivity in Baking
The quest for gluten free Hawaiian rolls embodies more than just the pursuit of a delicious recipe; it represents a deeper understanding and respect for the diverse needs of our bodies. It’s crucial to bear in mind that this journey isn’t merely about replacing wheat flour with a gluten-free alternative. It’s about reimagining baking from the ground up, ensuring that the joy of breaking bread—an act as old as civilization itself—remains inclusive and accessible to all.
Embracing the Gluten-Free Baking Journey
Thus, as we embark on this journey to perfect gluten free Hawaiian rolls, we’re not just baking; we’re paying homage to the resilience of those who navigate their dietary restrictions with grace and determination. We’re crafting a space at the table for everyone, proving that with a bit of ingenuity and understanding, the world of baking knows no bounds.
Getting Started with Gluten-Free Baking
As we journey towards mastering the art of gluten free Hawaiian rolls, it’s pivotal to gear up with the right tools and ingredients. After all, gluten-free baking is an art and a science, requiring a bit more finesse and a few special gadgets in your culinary arsenal.
Tools for Making Gluten-Free Bread
First things first, let’s talk tools. A sturdy, reliable stand mixer, like a Kitchenaid, is worth its weight in gold. Mixing gluten-free dough demands a bit more muscle, and the robust power of a stand mixer ensures that your ingredients blend to perfection without wearing you out.
Next, a digital scale becomes your best friend. Gluten-free baking is a precise endeavor, where the balance of flours and liquids needs to be just right. Measuring by weight rather than volume ensures accuracy and consistency, two key ingredients in the recipe for success.
Bench scrapers and flexible dough scrapers are not to be overlooked. They help in handling the often stickier gluten-free dough, making it easier to shape your rolls without the mess.
Choosing the Right Gluten-Free Flour
Now, onto the cornerstone of gluten-free baking: the flour. Not all gluten-free flours are created equal, and for gluten free Hawaiian rolls that truly shine, choosing the right blend is paramount.
A high-quality all-purpose gluten-free flour blend that contains xanthan gum (a binder to replace gluten) can be a good starting point. However, for those adventurous souls willing to blend their own, mixing starches like tapioca or potato with rice flour and a protein like almond meal can create a balanced mix that mimics the properties of traditional wheat flour.
Remember, the magic is in the mix. Gluten-free baking often requires a combination of flours to achieve the right texture and flavor. So, don’t be afraid to experiment until you find the blend that brings your gluten free Hawaiian rolls to life.
Embarking on the gluten-free baking journey can seem daunting at first, but armed with the right tools and a bit of know-how, it transforms into an exciting adventure. As we progress, we’ll dive into the heart of the recipe, guiding you step by step to ensure your gluten free Hawaiian rolls are not just good, but are a triumph of texture and taste. After all, in the world of gluten-free baking, every roll is a canvas awaiting your masterpiece.
The Ultimate Gluten-Free Hawaiian Rolls Recipe
Now, we arrive at the heart of our culinary journey—the recipe for gluten free Hawaiian rolls that promise to bring the sweet, fluffy delight back into your gluten-free life. With the right blend of ingredients and a touch of patience, you’ll find yourself pulling apart a roll that’s so close to the real deal, that you might just do a double-take.
Preparing the Dough
- Start with the Dry Ingredients: In the bowl of your stand mixer, whisk together 3½ cups of your chosen gluten-free flour blend, 1 cup of granulated sugar, 1¾ teaspoon of baking powder, 2 tablespoons plus 1½ teaspoon of instant yeast, and 1 teaspoon of salt. The sugar not only adds sweetness but also feeds the yeast, creating those airy pockets we love.
- Add the Wet Ingredients: With the mixer on low, gradually pour in 1¼ cups of milk (dairy or a non-dairy alternative works fine) and 2 large, lightly beaten eggs. Then, add ¾ cup of softened butter (or a dairy-free substitute), a little at a time, until fully incorporated.
- Mix to Perfection: Increase the speed to medium-high and let the mixer work its magic for about 5 minutes. This step is crucial for activating the xanthan gum in your flour blend and getting that dough to the right sticky consistency.
- First Rise: Scrape the dough into a rough ball in the center of the bowl. Cover with plastic wrap and set it in a warm, draft-free area until it has doubled or tripled in volume—about 2 hours. This is where the yeast does its job, creating the light and airy texture we’re after.
Shaping and Weighing the Rolls
- Chill the Dough: Gluten-free dough is notoriously sticky. Chilling it in the refrigerator for at least 6 hours (or up to 3 days) makes it easier to handle.
- Portion and Shape: Once chilled, divide the dough into small portions, about 1.5-2 ounces each. This is where your digital scale comes in handy, ensuring each roll is the perfect size for even baking. Roll each portion into a smooth ball. For a tighter shape, cup your hand into a “C” around the dough, rolling it against the countertop with slight pressure.
Baking to Perfection
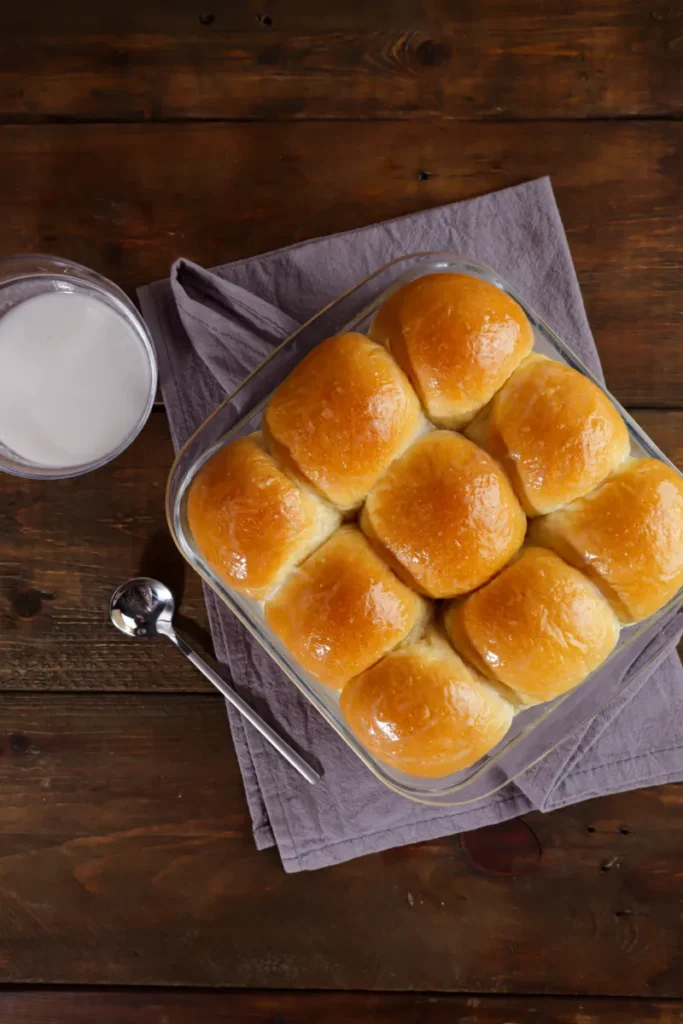
- Preheat and Prepare: Preheat your oven to 350°F (177°C). Arrange your shaped rolls in a greased baking dish, giving them just enough room to expand.
- Second Rise: Cover the dish with a clean kitchen towel and let the rolls rise in a warm, draft-free spot until they’ve doubled in size—this takes about an hour.
- Brush and Bake: Gently brush the tops of the rolls with melted butter, then bake for 22-25 minutes, or until they’re golden brown and spring back when lightly touched.
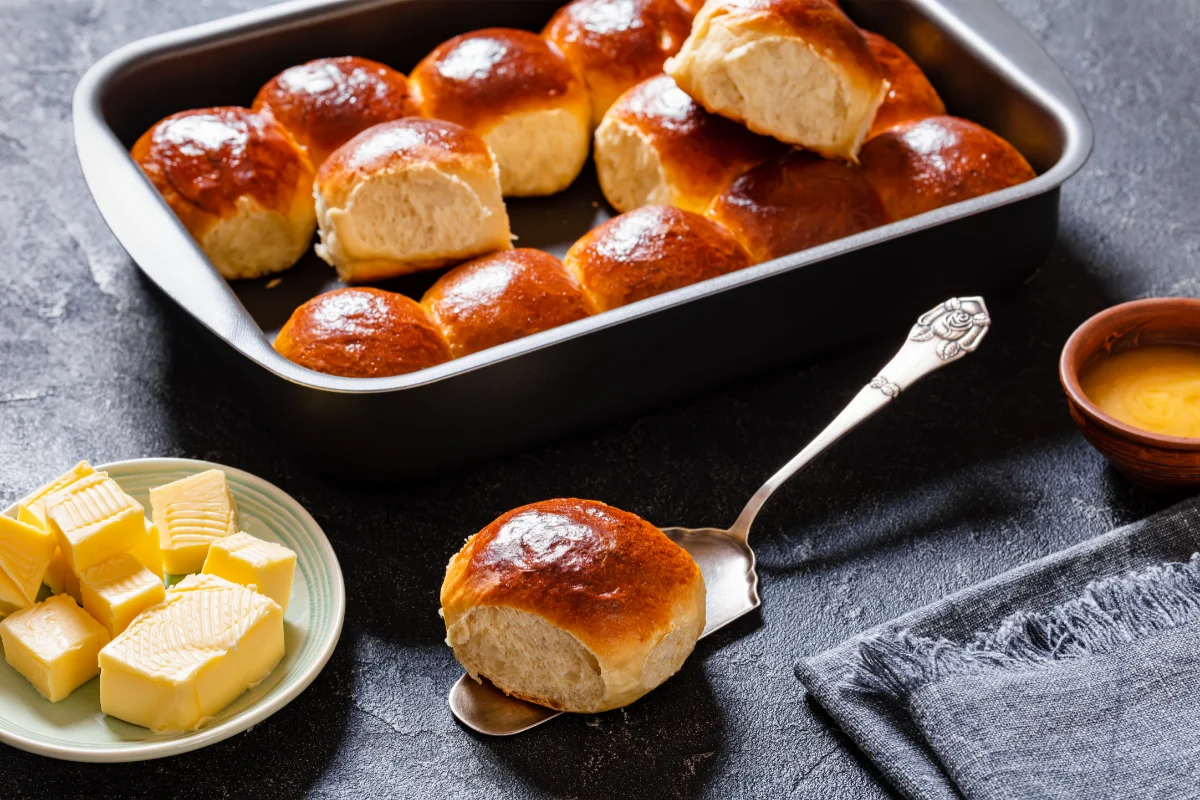
- Serve Warm: For the ultimate experience, serve these gluten free Hawaiian rolls fresh from the oven, with extra butter for slathering.
This recipe, a testament to the joy of gluten-free baking, ensures that no one misses out on the buttery, sweet delight of Hawaiian rolls. Remember, the key to gluten free Hawaiian rolls that truly satisfy lies in the joy of the process and the love you knead into the dough. So, embrace the adventure, and let the baking begin!
Personalizing Your Gluten-Free Hawaiian Rolls
One of the joys of home baking, especially when it comes to gluten free Hawaiian rolls, is the ability to customize the recipe to suit your tastes and dietary needs. Whether you’re aiming for a slightly different flavor profile or need to adjust for other dietary restrictions, a few simple tweaks can make all the difference.
Sweet and Savory Variations
- For a sweeter roll, consider adding a touch more sugar or a drizzle of honey into the dough mixture. This can enhance the natural sweetness that is characteristic of Hawaiian rolls.
- To create a savory twist, mix in minced garlic or onion powder to the dough. Additionally, brushing the rolls with garlic-infused butter before baking can add a delightful depth of flavor, perfect for pairing with dinner dishes.
Dairy-Free Adaptations
Given the increasing need for dairy-free options, adapting the recipe for gluten free Hawaiian rolls to be dairy-free is simpler than you might think.
- Milk: Opt for almond milk, coconut milk, or any other dairy-free milk alternative. These options work seamlessly in the recipe, ensuring the dough achieves the right consistency without dairy.
- Butter: Substitute the butter with coconut oil or a dairy-free butter alternative. Look for a substitute that is solid at room temperature to mimic the texture and moisture that butter would typically add to the rolls.
These adaptations ensure that the gluten free Hawaiian rolls remain inclusive, allowing even those with dairy sensitivities or preferences to indulge in the soft, fluffy delights.
Customizing your gluten free Hawaiian rolls is not only a way to ensure they meet your dietary needs but also an opportunity to get creative in the kitchen. Whether opting for sweeter rolls to serve as a dessert or savory ones to accompany a hearty meal, the possibilities are endless. Remember, the essence of great baking lies in experimentation and the joy of sharing your creations with others. So, don’t hesitate to tweak, taste, and tailor your gluten free Hawaiian rolls to perfection, making every bite a testament to your culinary flair and consideration for every guest at your table.

Preparing Ahead and Storage Tips
The beauty of gluten free Hawaiian rolls lies not only in their delicious taste but also in their versatility. Preparing these rolls ahead of time and knowing how to store them properly can make your life a whole lot easier, especially when planning for events or managing a busy schedule.
Freezing and Thawing Instructions
Making Ahead: You can prepare the dough for your gluten free Hawaiian rolls in advance. After shaping the rolls, place them in your baking dish, cover tightly with plastic wrap, and then with foil. At this stage, they can be frozen for up to a month, ensuring you have fresh bread ready whenever the occasion arises.
Thawing: To thaw, transfer the frozen rolls to the refrigerator the night before you plan to bake them. Allow them to come to room temperature for a couple of hours before proceeding with the final rise and bake as directed in the recipe. This method ensures your rolls retain their texture and taste, just as if you had prepared them fresh.
Keeping the Rolls Fresh
After baking, if you have any leftovers (although that’s unlikely because they’re so delicious!), it’s important to store them properly to keep them soft and flavorful.
- Short-term Storage: For keeping the rolls for a few days, ensure they cool completely after baking. Then, store them in an airtight container at room temperature. They’ll stay soft and delicious for up to 3 days.
- Reviving Rolls: If the rolls have started to firm up, a quick trick to bring back their softness is to wrap them in a damp paper towel and microwave for about 20 seconds. They’ll emerge as if freshly baked.
With these make-ahead and storage tips, gluten free Hawaiian rolls become not just a treat for special occasions but a convenient, delicious option for any meal. Whether you’re planning a large family dinner, prepping for a busy week, or simply want the comfort of knowing that a warm, fluffy roll is never too far out of reach, these strategies ensure that your gluten free Hawaiian rolls are always at their best.
Frequently Asked Questions
Embarking on the adventure of baking gluten free Hawaiian rolls can stir up quite a bit of curiosity and, understandably, a few questions. Here, we address some of the most common inquiries to help smooth out any wrinkles in your baking journey.
Is there a gluten free Hawaiian roll?
Yes, there are gluten-free Hawaiian rolls available both in some stores as specialty products and through various online recipes for home baking. These alternatives use gluten-free flour blends to mimic the soft, fluffy texture and sweet taste of traditional Hawaiian rolls, making them suitable for those with gluten sensitivities or celiac disease.
Are Sara Lee Hawaiian rolls gluten free?
As of my last update, Sara Lee did not offer a specific gluten-free Hawaiian roll product. Sara Lee does produce a variety of bread products, but for those specifically seeking gluten-free options, it’s essential to look for brands or recipes that are explicitly labeled as gluten-free. Always check the latest product offerings and ingredient lists, as manufacturers can change their product lines.
How long will Hawaiian rolls stay fresh?
Hawaiian rolls, like most bread, are best enjoyed fresh, typically within 2 to 3 days of baking or purchase. To extend their freshness, you can store them in an airtight container at room temperature. For longer storage, Hawaiian rolls can be frozen for up to 3 months. Thawing them at room temperature or warming them in the oven before serving can help restore their softness and flavor.
Do Hawaiian rolls have dairy?
Traditional Hawaiian rolls do contain dairy, usually in the form of butter and sometimes milk, contributing to their rich flavor and tender texture. However, for those who are dairy-free, there are recipes and store-bought options that substitute dairy ingredients with plant-based alternatives, ensuring the rolls remain moist and delicious without the use of traditional dairy products.
Can I use a different flour blend for this recipe?
Absolutely, but proceed with caution. The flour blend is the backbone of any gluten-free baking recipe, and each blend behaves differently. If you’re experimenting with a new blend, start with a small batch to see how it affects the texture and taste of your rolls. Remember, the goal is to mimic the properties of wheat flour as closely as possible, so blends that include ingredients like xanthan gum or guar gum can be particularly helpful.
Can these rolls be made dairy-free?
Yes, they can! As mentioned in the customizations section, you can easily substitute dairy ingredients with their non-dairy counterparts. Use a dairy-free milk alternative and a butter substitute to ensure your gluten free Hawaiian rolls are both gluten-free and dairy-free, making them even more inclusive.
How do I ensure my rolls are fluffy and not dense?
The secret to fluffy gluten free Hawaiian rolls lies in the rise. Ensure your yeast is fresh, and give your dough plenty of time to rise in a warm, draft-free environment. Gluten-free doughs benefit from a longer rise time compared to their gluten-containing counterparts, so don’t rush this step. Additionally, accurately measuring your ingredients, especially the flour, is crucial to avoid a dense texture.
Can I add additional flavors to these rolls?
Yes, the basic recipe for gluten free Hawaiian rolls serves as a fantastic canvas for your culinary creativity. Feel free to add inclusions like orange zest for a citrusy twist, or swap out some of the sugar for maple syrup for a different kind of sweetness. The versatility of this recipe means you can tailor it to fit the flavor profile you’re craving.
Why did my dough not rise?
Several factors could be at play if your dough didn’t rise. First, check the expiration date on your yeast; expired yeast loses its potency. Temperature is another critical factor; if your proofing environment is too cold, the yeast won’t activate properly. Finally, ensure that the liquid ingredients aren’t too hot, as this can kill the yeast. Aim for a warm, not hot, temperature for your liquids.
With these FAQs in mind, you’re well-equipped to tackle the world of gluten free Hawaiian rolls. Remember, gluten-free baking is as much about the journey as it is about the destination. So, embrace the process, learn from each batch, and enjoy the delicious rewards of your labor.
Conclusion: The Joy of Baking Gluten-Free Hawaiian Rolls
Embarking on the journey to create the perfect batch of gluten free Hawaiian rolls is more than just a culinary endeavor; it’s a path to inclusivity, a nod to health consciousness, and a testament to the resilience of those who refuse to let dietary restrictions dampen their spirit or diminish the joy of eating well.
Through each step of this guide, from selecting the right tools and ingredients to mastering the art of gluten-free baking and personalizing your rolls to suit any taste or dietary need, the message is clear: gluten-free baking is not just possible; it’s a delightful exploration of flavors, textures, and possibilities.
Remember, baking gluten free Hawaiian rolls is as much about the love and care you put into the process as it is about the ingredients. Each roll you bake is a warm embrace for friends and family, regardless of their dietary needs. These rolls are not merely a substitute for their gluten-containing counterparts but stand proudly on their own, bursting with flavor, softness, and the unmistakable touch of homemade goodness.
So, whether you’re a seasoned gluten-free baker or someone just starting to navigate the gluten-free world, let this guide be your compass. The road to baking excellent gluten free Hawaiian rolls is paved with trials, errors, and ultimately, triumphs. And remember, each batch, whether perfect or perfectly imperfect, is a celebration of the diversity of our diets and the beauty of bringing everyone together around the table.
In the end, the aroma of freshly baked rolls, the joy of sharing them with loved ones, and the satisfaction of creating something beautiful and delicious from scratch are the true rewards of your baking adventure. So go ahead, preheat your oven, and let the magic of gluten-free baking fill your home and heart.
More Delicious Recipes:
- Haupia Pie: Dive into the creamy sweetness of Haupia Pie, a traditional Hawaiian dessert that will transport you to the sun-kissed shores with every bite.
Haupia Pie: A Guide to Making Hawaii’s Beloved Coconut Dessert
- Malasadas: Craving something heavenly? Click to discover the irresistible temptation of Malasadas, pillowy Portuguese doughnuts that promise to satisfy your sweet cravings like never before.